Imaxel Printspot for Woocommerce
Plugin installation
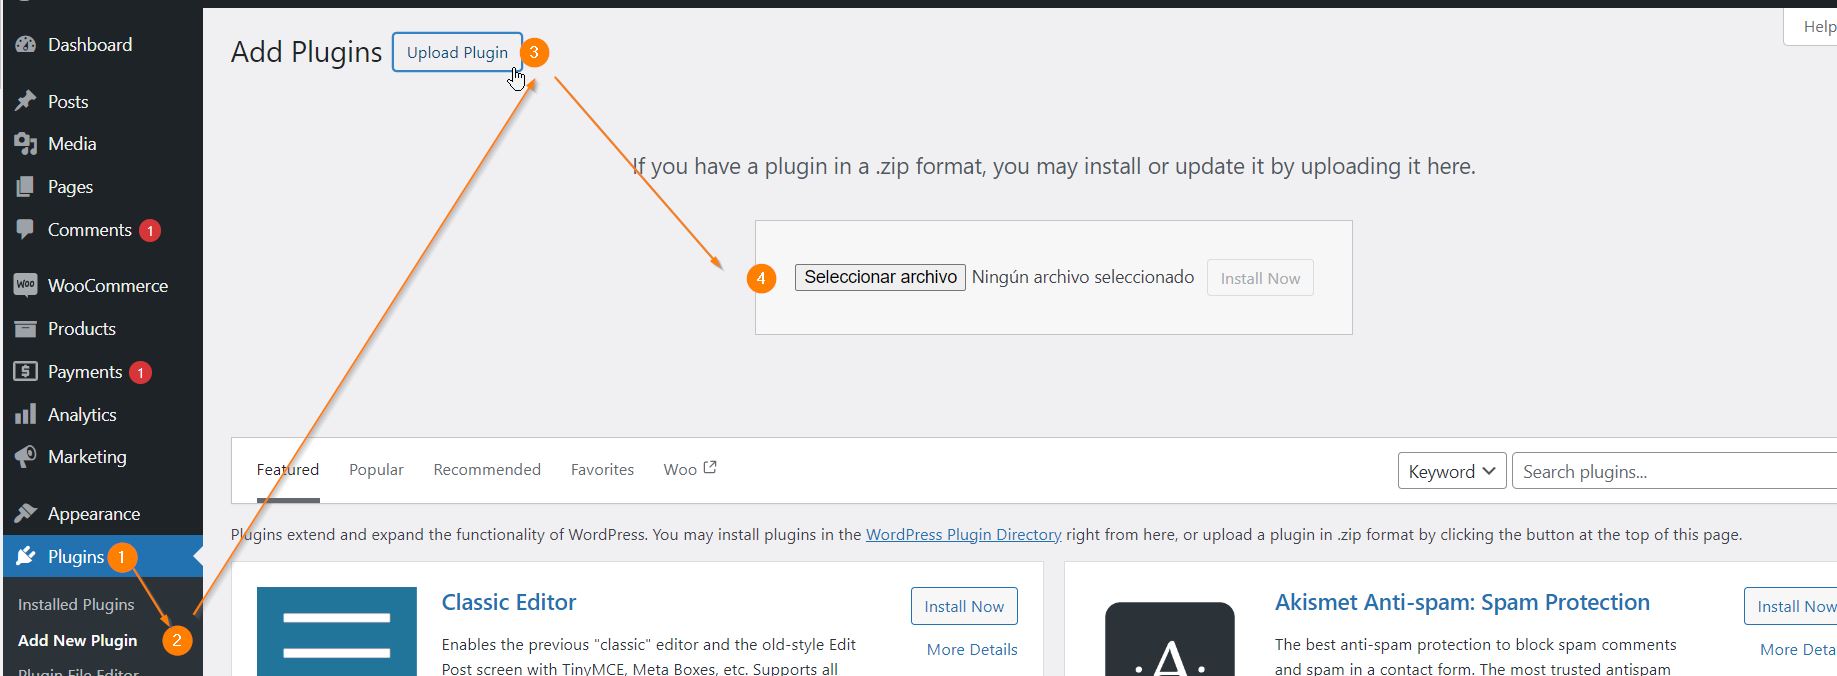
To install the plugin you must go to the Plugins tab and select Add new plugin – Upload Plugin, and upload the zip file that contains the plugin we’ve send it to you
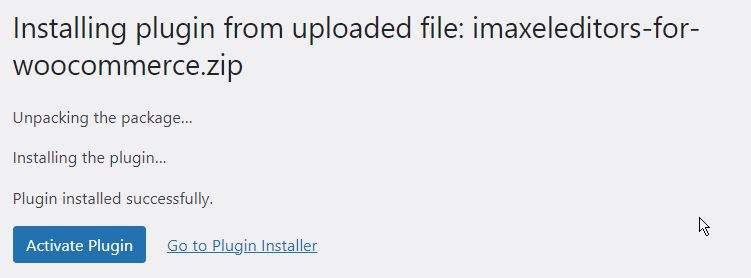
Once installed you must activate it to continue with the configuration:
Plugin configuration
The next step is to configure the plugin with the licence key provided by Imaxel.
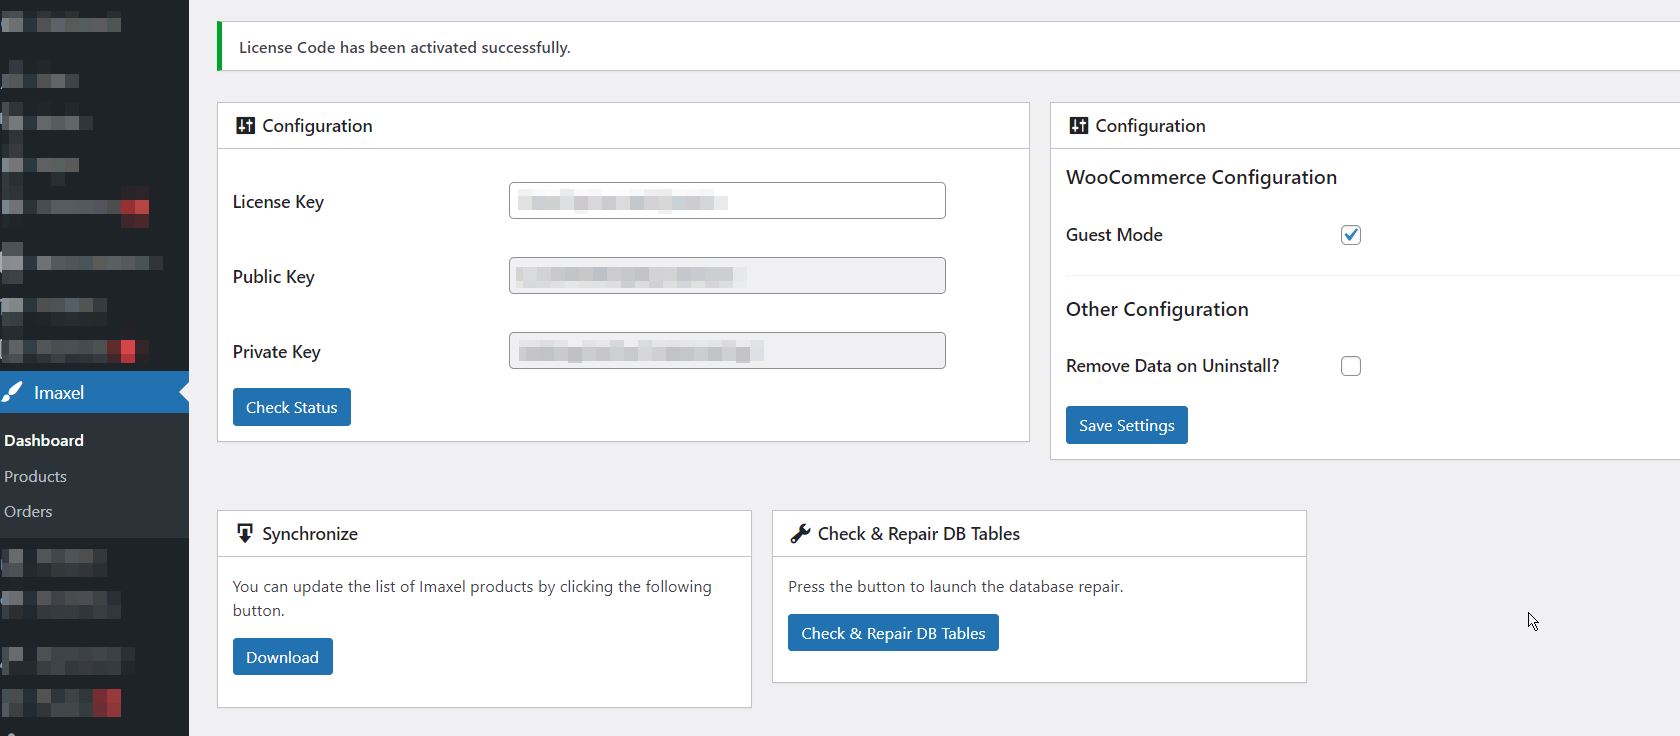
To do this, go to the Imaxel-Dashboard section of the side menu and enter the licence key.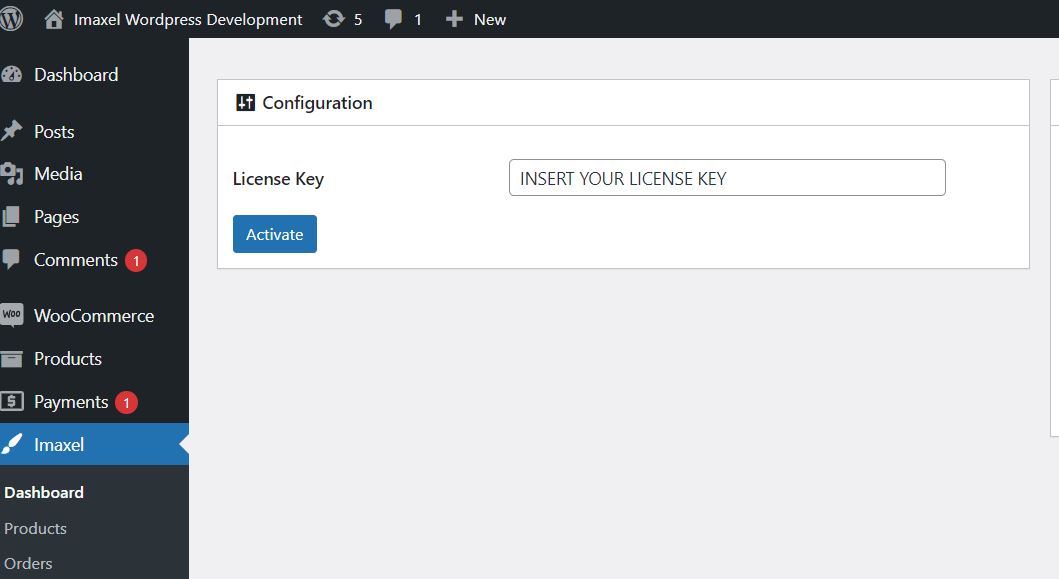
Once done, you should see the confirmation that it has been activated correctly, as shown in the following image:
Next, we need to import the product templates into the Woocomerce environment by clicking the following button:
Once this is done, we will be informed of the number of imported templates:
IMPORTANT! Every time we register new templates in our template manager, we must come back to this section and update the list of product templates using this button. Only then these new product templates will be available in the plugin and can be linked in Woocommerce.
Link Woocommerce products with Imaxel templates
The first step is to create the products in Woocommerce. This is a native Woocommerce process.
Next, we will link the product we are interested in to the Imaxel product templates.
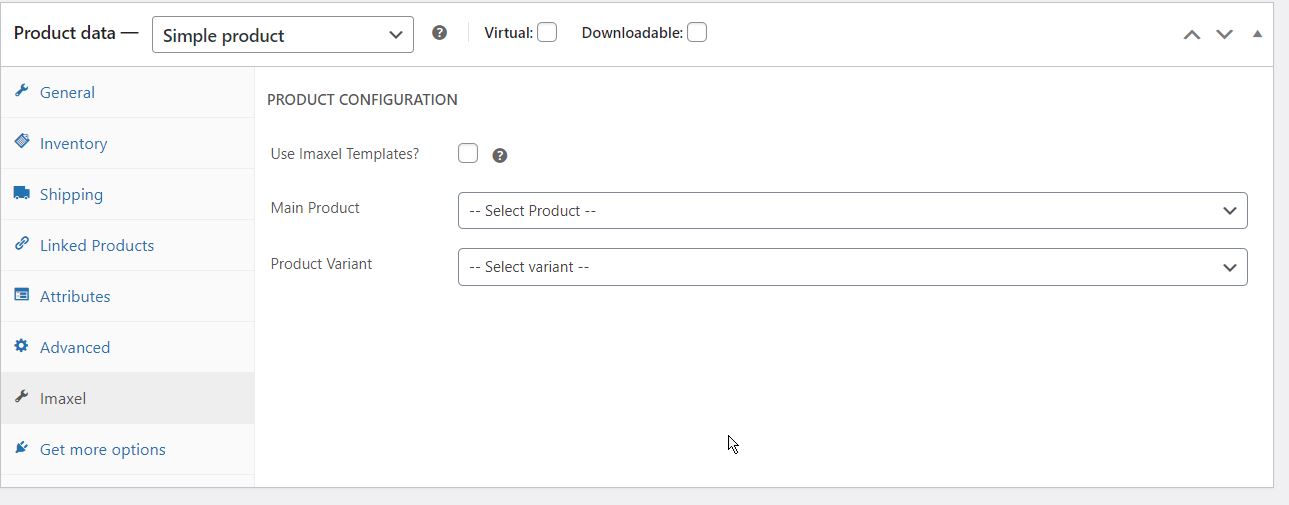
We access the product edition and go to the Product Data section where we will see a new tab called Imaxel.
This tab, has a checkbox that enables or disables the linking of this woocomerce product with an Imaxel product template:
And underneath there is a box to Filter the desired template or we can use the drop-down menu to search for it.
The last step is to save the changes and the product will be linked.
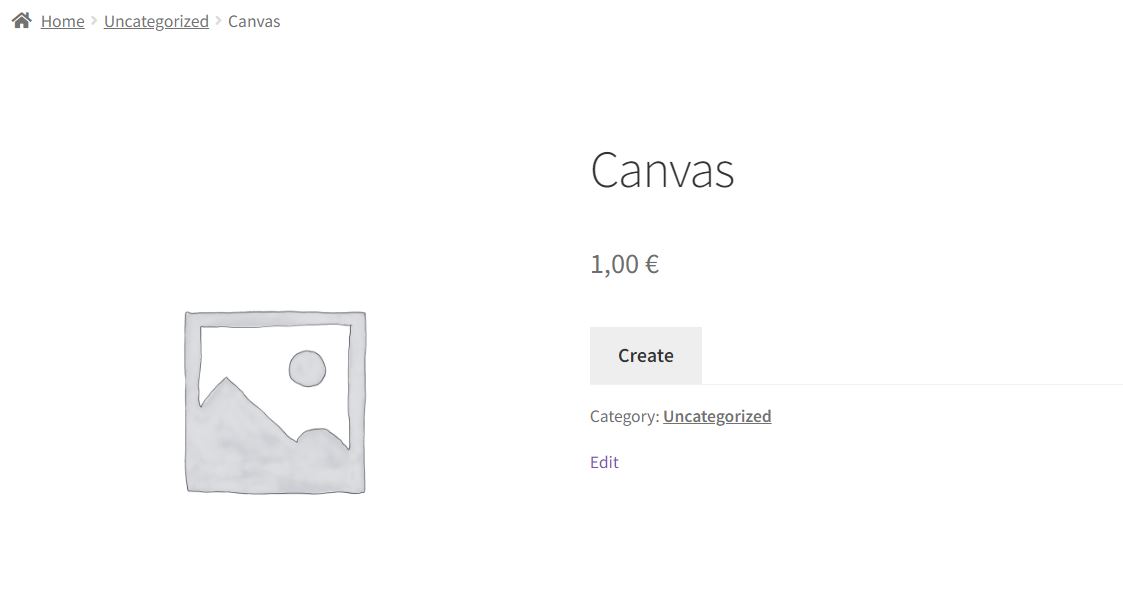
Once you have done this, you will see on the front end that the woocommerce “Add to cart” button no longer appears, but the “Create now” button, which is the one that links to our editor:
When the customer selects the button, a call is launched to load the form with the previously defined steps that allows the customer to customise the product and send it to the cart to finalise the order.
Product Price
The price of the product has to be registered in the Backoffice of Imaxel products and it is the plugin itself who calculates the price in the customer’s order.
However, for this product to appear on our website with a visible price for the customer we must assign a price to our product in woocommerce, otherwise it will show it as free by default.
How to create a product with variations
Imaxel product templates can be created with different variants of the product, when registering a new product in Woocommerce we can display these variants for the customer to select one of them on the Web page, and at the time of editing only the selected variant appears.
To create these variations on a Woocommerce product, the first step is to link this template to an Imaxel product template as we have seen above:
and then follow the steps below:
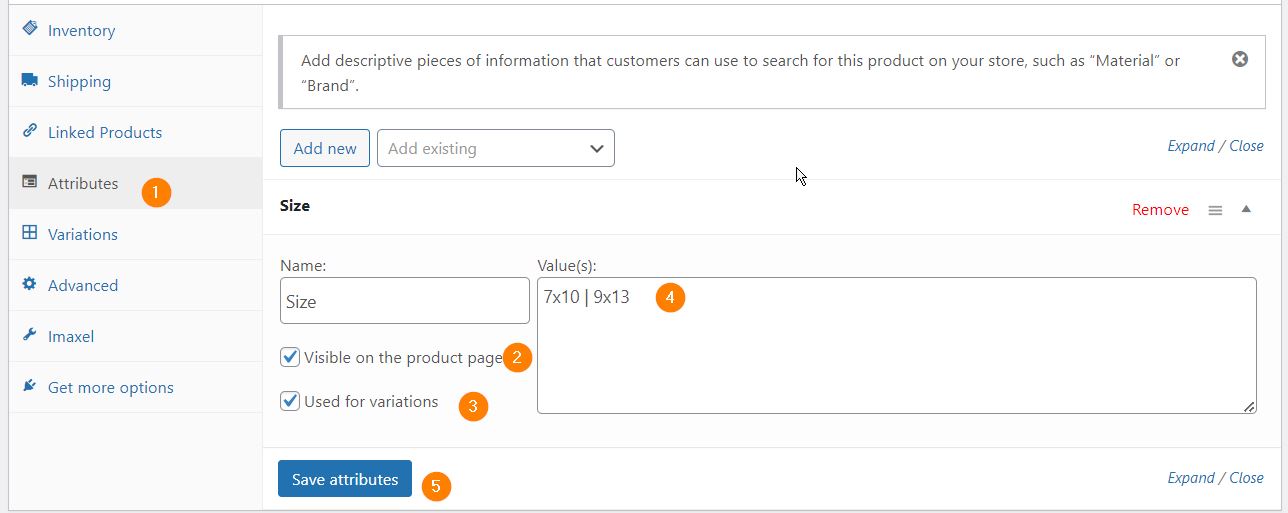
- Create attributes
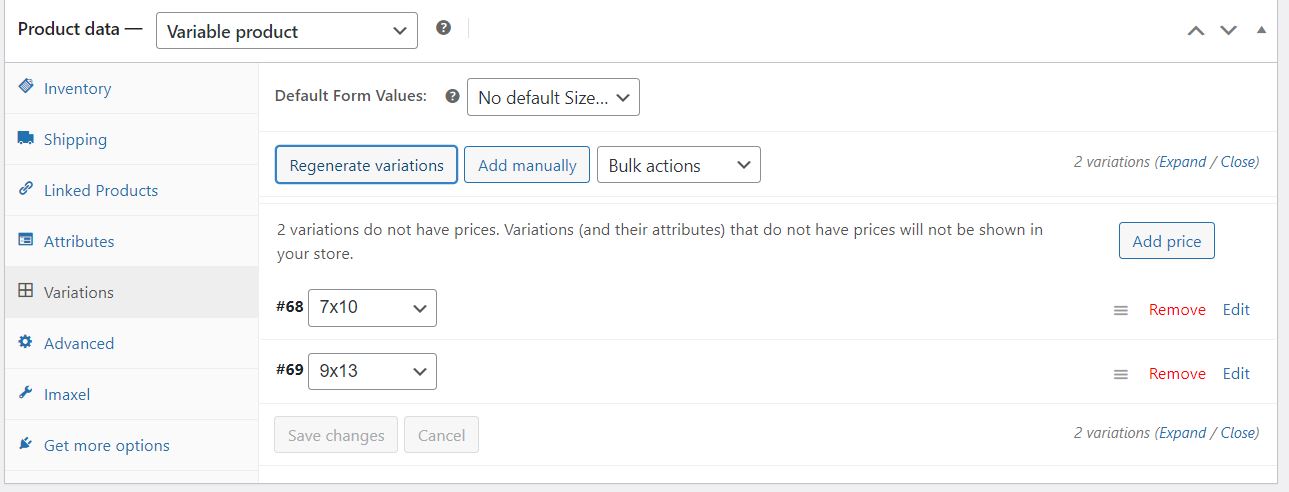
In the attributes section of the product data, we will register an attribute to which we will give a name, we will add the different attributes (these values must be separated with the character “|” ), we will tick the box Used for variations and Visible on the product page click on Save attributes.
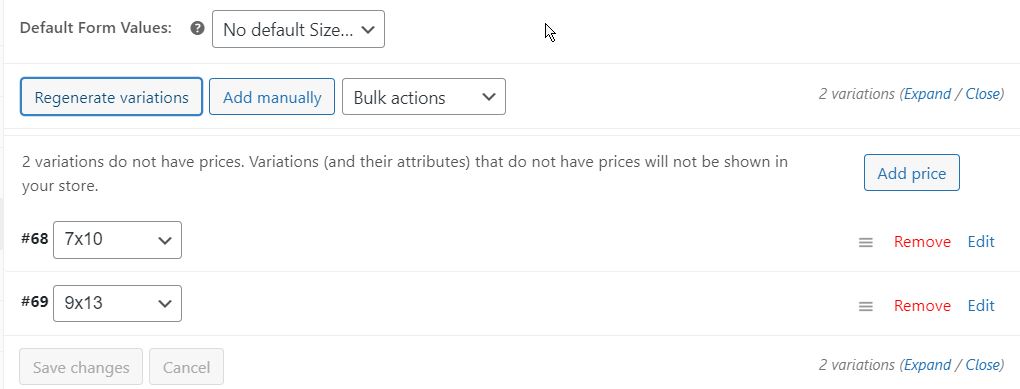
- Create Variations
In the variations section of the product data we will have to add a variation by selecting the option “Generate variations” and click on Go.
At the moment of creating the variations, a message will show us the variations of the attributes that are going to be generated, we accept and the variations created will appear.
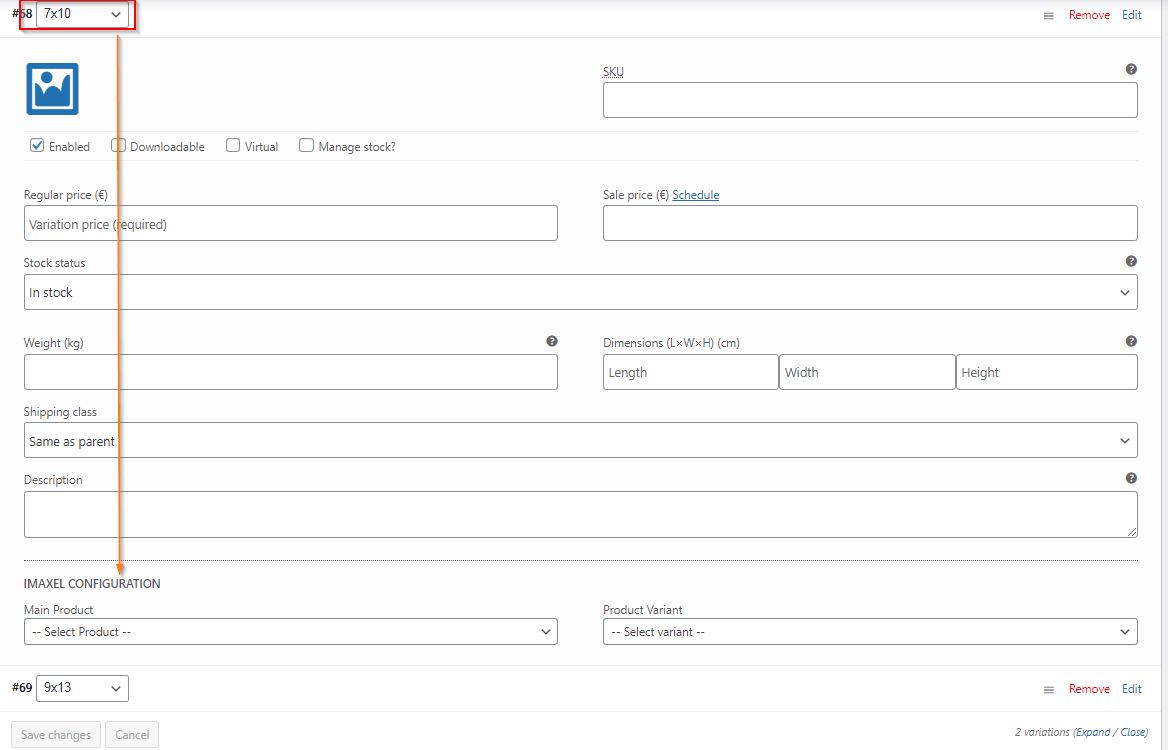
Once you have added variations, you will have to edit each of them to set a base price, link them to each variant in the template and save the changes.
The last step is to update the product so that all these changes are reflected on our website.
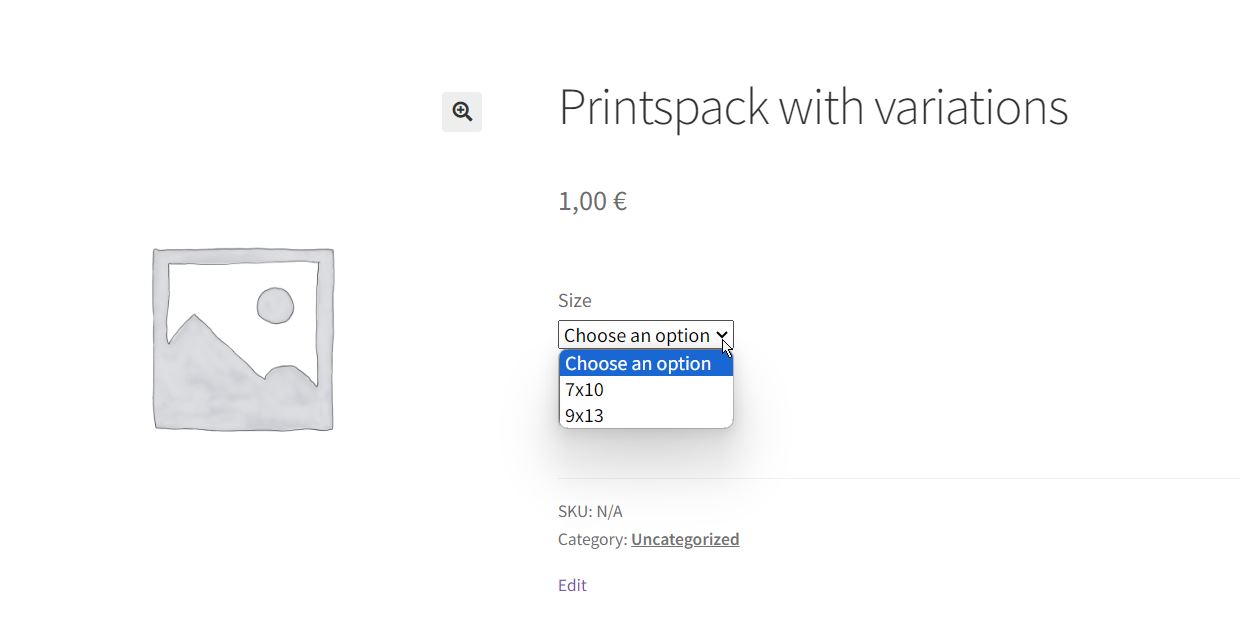
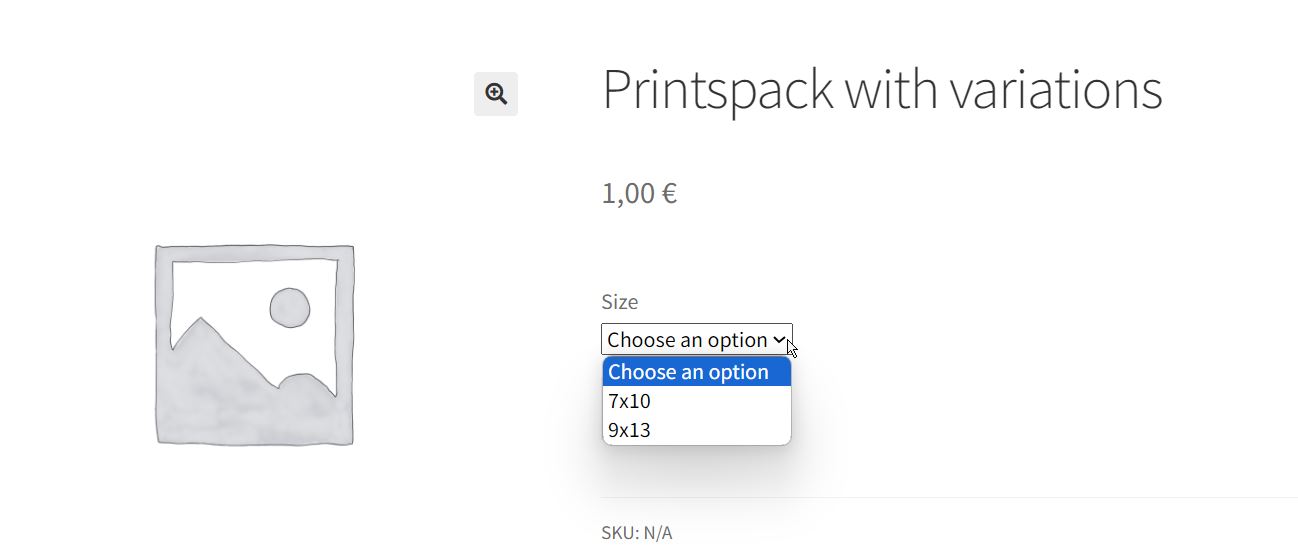
On the front of the website the woocomerce variations will appear and each of them will link to the variation of the product template we have selected:
FAQ
-
How can users access their saved designs?
Each time a user completes an order or saves a copy of their design, a **project is created. This means each design is a project.** These projects contain the user’s design information and are accessible from a section in their Private Area called Imaxel Projects.
On this screen, the user can check the status of their project: if it’s in the shopping cart (in Cart), if it’s stored (not purchased), or if it has been purchased (purchased):
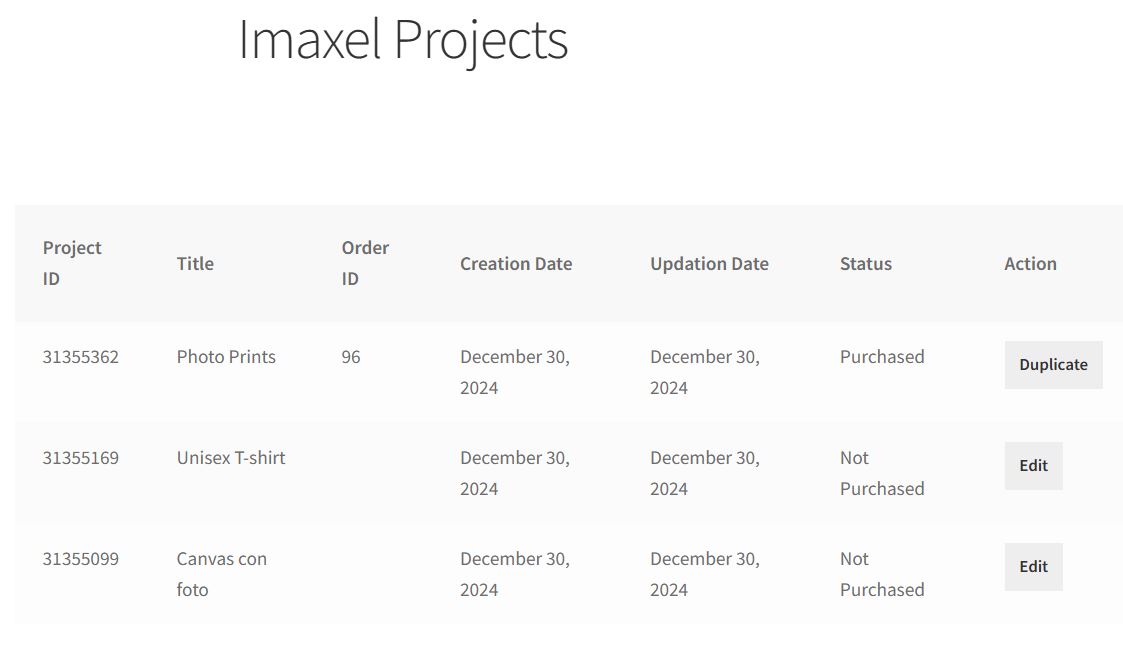
Similarly, different actions can be performed on the project. For an order, it can be duplicated to generate a new order, and if it hasn’t been purchased, it can be added to the shopping cart to complete the purchase.
We store them for 90 days from the date of the last update/edit by the consumer for most products. For Print products, we store them for 15 days after the consumer’s last update/edit. -
How long are consumer projects stored?
Regardless of the project’s status in the Imaxel Projects section, each design has an expiration time.
**Normal print projects are stored for 15 days, and all others for 90.**
This period resets every time the user accesses the project and saves a new version.Let’s say a user creates an Album project on January 1st. After 90 days, the project will be deleted, but if they access the project from the Imaxel Projects section, open it, and save a new version on day 89, the counter will reset, and it will be available for 90 more days. -
What happens if a user wants to purchase a project that is no longer available?
This action is not possible, and the plugin will prevent the completion of a purchase for a project that is not available, notifying the user accordingly. This way, we prevent the customer from buying something that is not accessible.
-
I updated the theme or a plugin, and the editor stopped working.
WordPress plugins are written by a vast community of programmers who operate with minimum requirements and lack mechanisms to check their compatibility with other plugins or themes. Therefore, it is important to adhere to the minimum requirements. -
I installed the plugin, and it’s not working.
Our plugin is tested on a basic WordPress/WooCommerce installation. It’s likely that another plugin is conflicting with it. We recommend performing the installation in a test environment to deactivate plugins and pinpoint the conflict. -
What versions is it compatible with?
It is built to be compatible with the latest versions of WordPress and WooCommerce, and we maintain an active development line to ensure this remains true. -
Is there any type of branding or added mark?
No, the plugin integrates into the website and is an unbranded (white-label) component. -
How is it made?
The plugin is written using predefined functions of WordPress’s own language, ensuring maximum compatibility. -
Does it integrate with Local Pick Up Plus?
Local Pick Up Plus is another plugin that allows the creation of physical pickup points in WooCommerce, giving consumers the option to collect their order from a physical store. Our plugin is compatible, adding the pickup point information to the order summary. -
Who charges for the order? Does the plugin intervene in order shipping?
Payment management is entirely handled by WooCommerce, as is shipping management. Our plugin does not intervene in either. -
Where are user photos hosted? Is there a space limit?
Imaxel hosts its platform on AWS (the world’s largest) in different regions to provide the best service. All images are uploaded and stored on this server. The merchant’s website doesn’t need to be powerful because Imaxel manages image and order traffic. -
Who sets product prices?
The merchant. Our plugin does not set or modify prices.

